Google Tag Manager
Install the new Consent Mode V2 with GTM and Cookiebot
By:
Raj Gurung
Published On :
January 26, 2024

As of January 2024, Google has announced that consent mode v2 is been mandatory in all of the consent management platforms.
so we are going to look at how are we going to integrate the Google consent mode v2 with Google Tag Manager and your consent management tool (cookiebot)
To set up, firstly you need to set a few things-
- Setting up GA4 on your website
- The base GA4 tag needs to be installed on your website
- Google Tag Manager needs to be installed on your website
- Install all the important plugins on your website for analytics
- Set your consent management tool and install it on your website
This mode allows the user to provide or deny consent to providing their data to Google or not. But even if the user denies all of the permission, the Google Tag manager will still send the cookie-less data to the Google Analytics 4
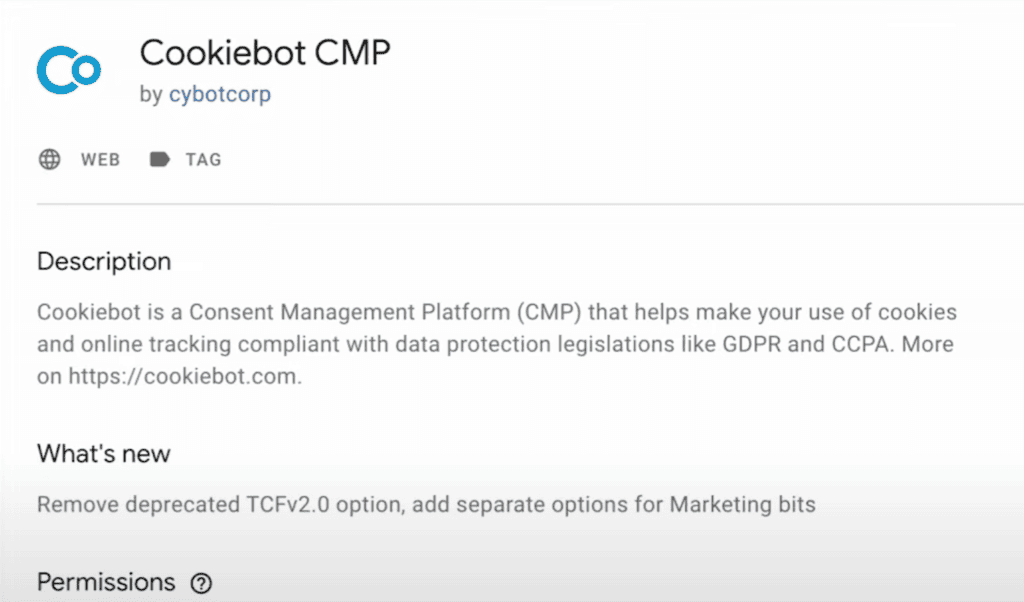
Firstly as we are using Cookiebot as our consent management tool, we need to log on to our cookiebot and connect your website to the tool.
Now to connect the Google Tag Manager to the cookiebot, we need their custom tag template.
cookiebot ID
One important thing that you need is the cookiebot ID
To get the ID you need to go to your tool’s dashboard and click on implementation under CMP banner and you will get the data-cbid code
In Google Tag Manager
Creating Tags
We need to create a tag for the tool.
- Go to New tag
- Click on Tag Configuration
- Go to the community template gallery
- Search for cookiebot CMP
Now you need to add the template to your workspace.
You need to paste the tool’s ID into the Cookiebot ID
And enable the Google consent mode

So now you need to add the default consent state.
The default consent state is the part where you can choose the location or the region where you want the tag to fire and enable or deny the webpage to send the user’s information to the admin.
If you choose the Region blank then the consent will fire globally.
Creating trigger
So now we need to give the trigger to the tag
As there is a prebuilt trigger called Content Initialization- All pages.
It is a specially-made trigger for the consent mode and fires in all the pages before the other tags fire.

Now Save the Tag.
After you save your tag and go to preview mode.
After the website is loaded you will get the new consent menu which allows you to allow or deny your user data to be provided to the admin.
So when you give your consent to the website, a tag will fire and we will get the event in the preview mode
Important
Even after the tag is created, the GTM is not connected with the consent tool which allows to block certain tags to which the user has not permitted to.
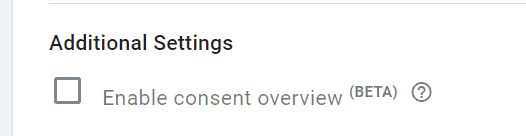
We need to enable the Consent Overview mode in the GTM to do so;
- You need to go to the Admin
- Click on the Container Settings
- And check the Enable consent overview
After saving the settings, you can go to your workspace and see there is a new button next to the New Tag.

And when you click the button you will see all the tags and their respective consent configuration.
Important
If you enable the trigger here then whenever the user denies or does not consent to certain things the respected tag will not fire but still send the cookieless ping which will still say that someone bought this product or subscribed to your newsletter
Now you can provide the consent to the tag that you want to.
Creating new triggers
Now you need to change all of the triggers that you have created to meet the consent requirements.
So you need to create a new event trigger that will fire when a certain consent is made even for all page triggers.
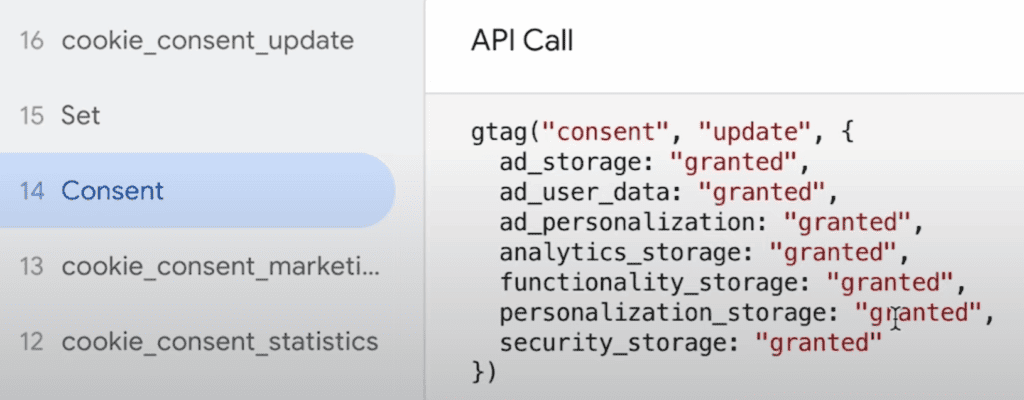
The important thing we need to know is that every time the consent is changed by the user the consent tag will send a cookie_consent_update, in which the newly updated or new consent is stored.

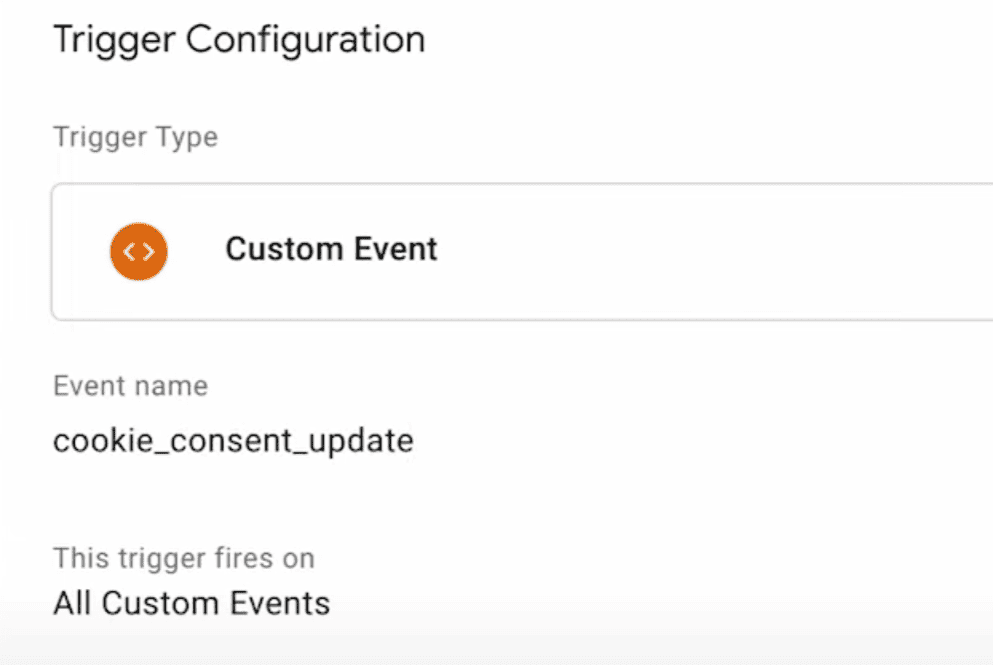
Now create a new event trigger
- Go to the Trigger section
- Click on the new trigger
- Select custom event
- Provide the event name: cookie_consent_update
- Save
Now apply this trigger to all of the All pages trigger

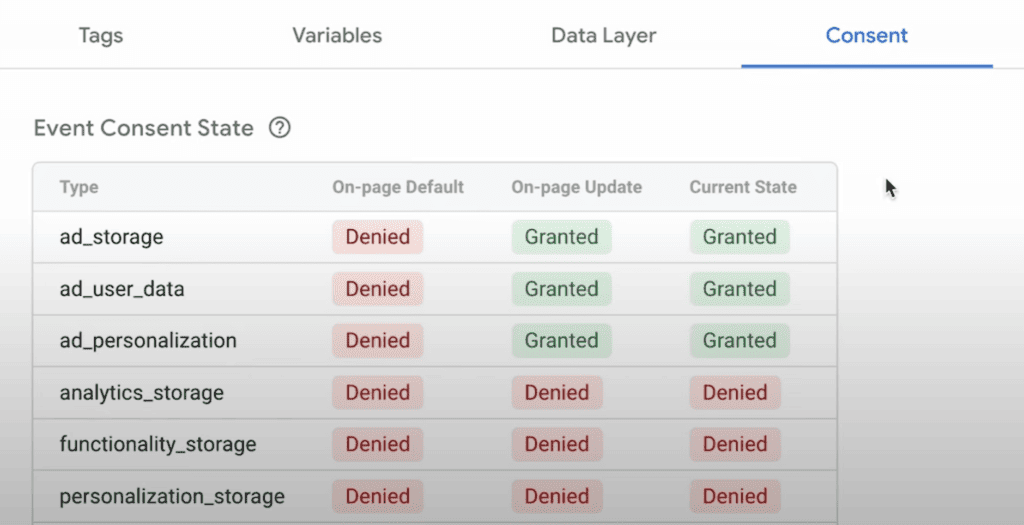
You can also check the new consent tab in the preview mode
Now you can test your tag by going to the Preview mode or going to Debug mode on your GA4
Do not forget to Publish your workspace and save all your tags and trigger

Humming Web
Let’s talk about your business goal and align the solution we provide with our digital marketing services.
FREE strategy callOur Services
© Humming Web. All Rights Reserved