Google Tag Manager
Mastering Form Data Capture for Ultimate Campaign Success
By:
Raj Gurung
Published On :
March 11, 2024

Today’s discussion focuses on the process of capturing data from URLs when visitors arrive at our site via Google Ads. We’ll explore methods for storing this information in first-party cookies and delve into techniques for integrating these parameters into our forms. This enables us to track the origin of our users and determine which advertising campaigns are most effective.
We will use Event Creator which will help us to create a URL which can store valuable data such as;
- Campaign name
- Campaign source
- Campaign ID
- campaign medium
==Important==
- The form must not be in the iFrame. If you see an option Reload frame? then I’ve got some bad news. This blog post will not be useful for you.
- Your form builder must have a feature to hide individual form fields (or you must have access to the developer who can hide them).
- Each hidden form field must contain an ID (it’s an HTML attribute).
What is a Campaign URL Builder
To get the data we will use a tool called Campaign URL Builder. A campaign URL builder is a tool that creates custom URLs with specific parameters to track the effectiveness of marketing campaigns. These URLs, also called “UTM parameters,” help identify traffic sources like social media, email, or ads. Marketers use them to analyze which campaigns are driving traffic and conversions. It’s a simple yet powerful way to optimize marketing efforts based on real-time data.
For more information, you can visit Campaign URL Builder
Creating the Campaign URL
First of all, you need to visit the Campaign URL Building tool’s official website.
In the URL builder, you can see many fields you can use to send information about your campaign.
The most important step you need to do is to Toggle the button from UA(universal analytics to GA4(Google Analytics 4)
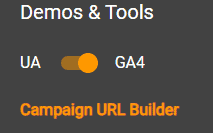
After choosing the GA4 you can now able to send the data which is compatible with the GA4 events. As you know Google has decided to phase out Universal Analytics so you need to choose the GA4 option
Now you need to fill in the information that the site has asked such as; campaign ID, campaign source, campaign medium and others.
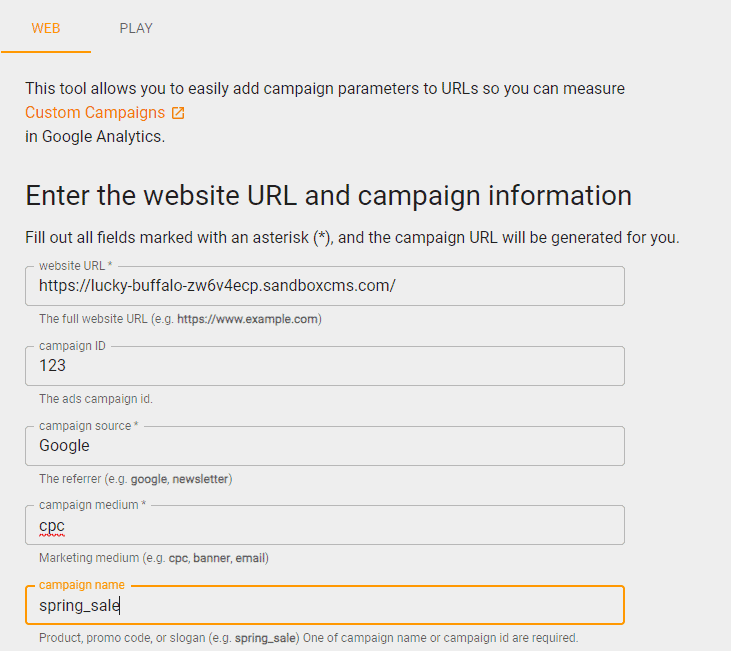
In our case scenario, here are the options that we have chosen;
- Website URL : (provide your site URL)
- Campaign ID: what is your ads campaign ID
- Campaign Source: where are the ads coming from
- Campaign medium: what is the medium of the ads
- Campaign name: name of the campaign
All of the data that we have provided in this blog are examples, you need to input your actual data inside the fields
After you input all of the data inside the field you, the site will create a link for you with all the information provided above.
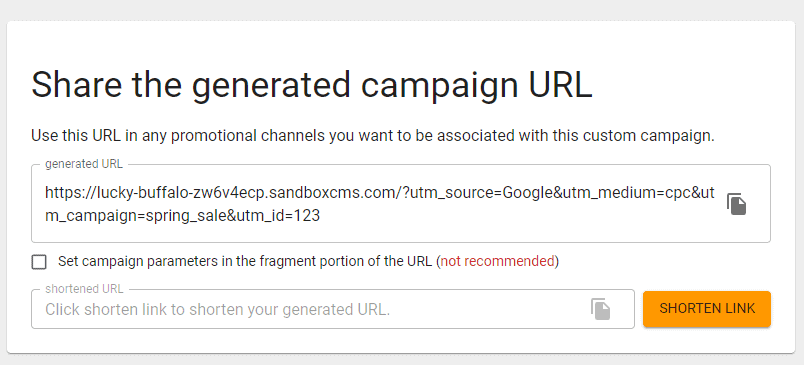
Now you need to copy the link and post it in your ads campaign in Google Ads.
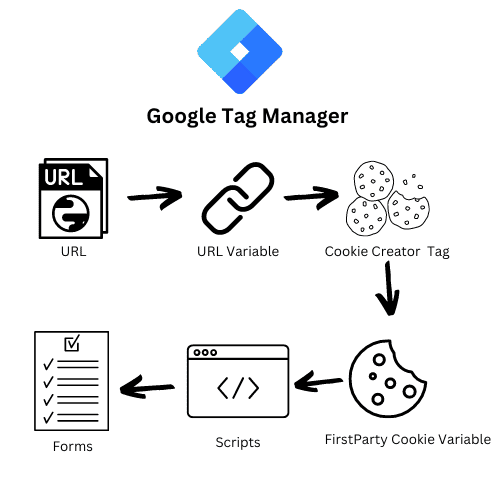
In Google Tag Manager
Now Tag Manager will create the following things;
- Create party cookies using Cookie Creator
- Script to insert the data inside the form
- Create URL variable
- Create a first-party cookie variable
Creating URL variable
The URL variable is needed to get the data from the URL and we can also create multiple URL variables to get value for the multiple parameters.
To create the URL variable ;
- Go to Variable
- Click on User Defined Variable
- Select **Variable configuration **
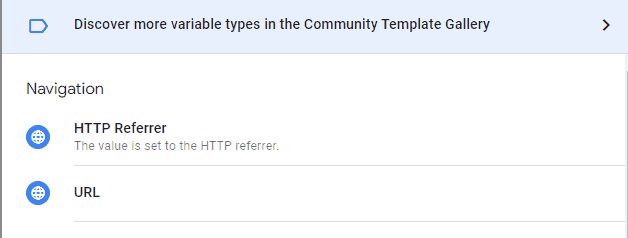
- Choose the URL under the Navigation Section
- After choosing the variable, change the Component Type to Query
- Input the query key that you want to take from the URL such as;
- utm_source
- utm_campaign
- utm_medium
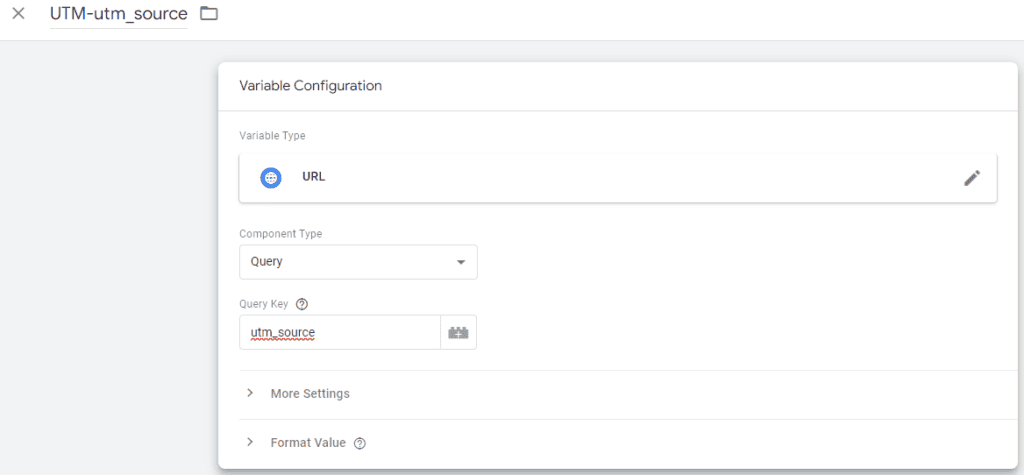
After the variable is created, you can give the variable a name and save the variable.
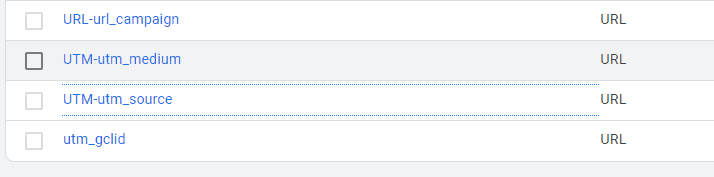
Similarly, you can create multiple variables using the same method.
Creating First-Party Cookies Tag
To create the cookie we will use a Tag Called Cookie Creator which you can find in the Community Template Gallery.
To create the tag;
- Go to the Tag section
- Click on New Tag
- Select Tag Configuration and click on the Community Template Gallery.
Now you need to search for the tag called Cookie Creator
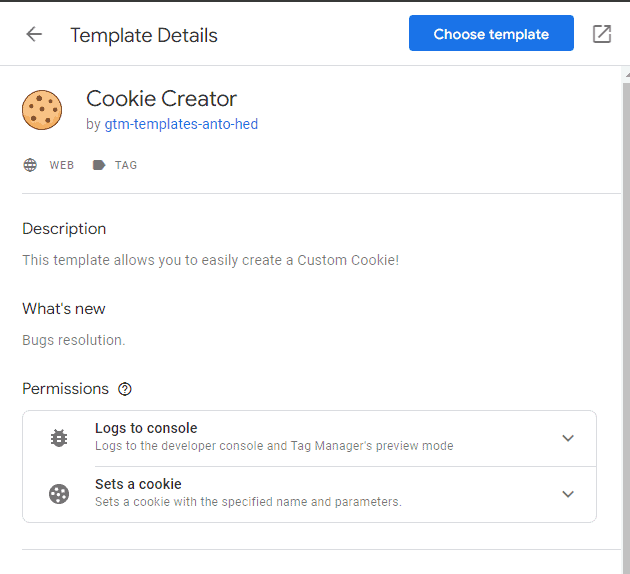
Now choose the Template and provide all the permission that the tag requires.
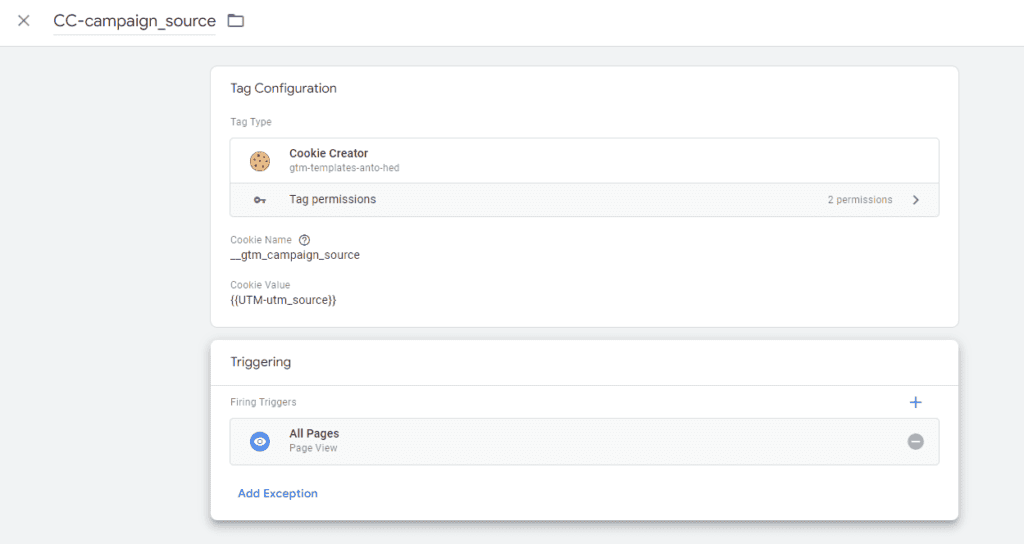
Creating Tag
Inside the tag, you will need to fill out the name of the first-party cookie and the value of the Cookie
Choose the following;
Cookie name : “__gtm_campaign_source (can be changed)”
Cookie Value : {{UTM-utm_source}} (the URL variable you created)
Creating Trigger
Now for the trigger you can choose All page view trigger
Save it
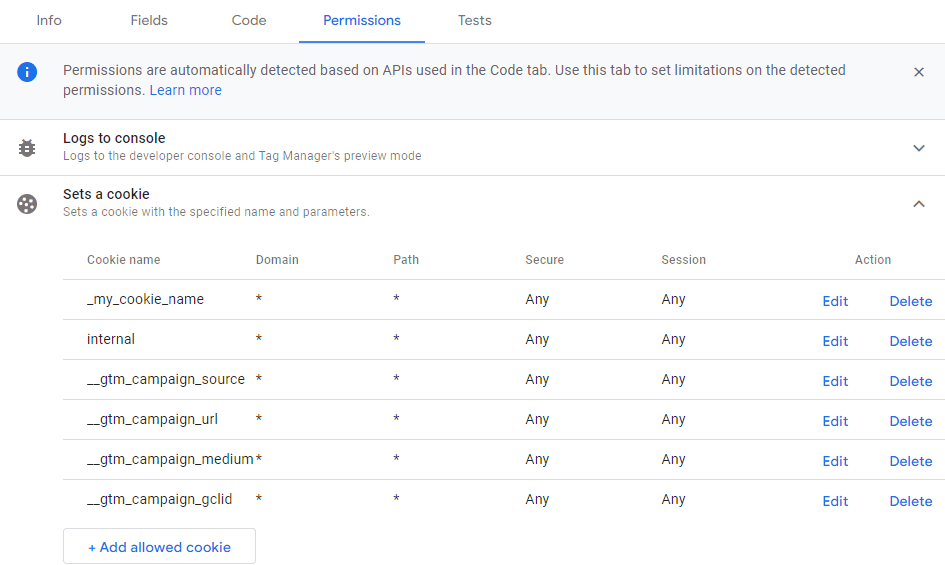
Before configuring the tag, you need to provide permission to the cookie name that you have chosen.
- Go to Templates
- Click on the Cookie Creator template
- Inside the Permission Tab, set the cookie name.
- Save
Now Give the tag a name and save the tag and the trigger.
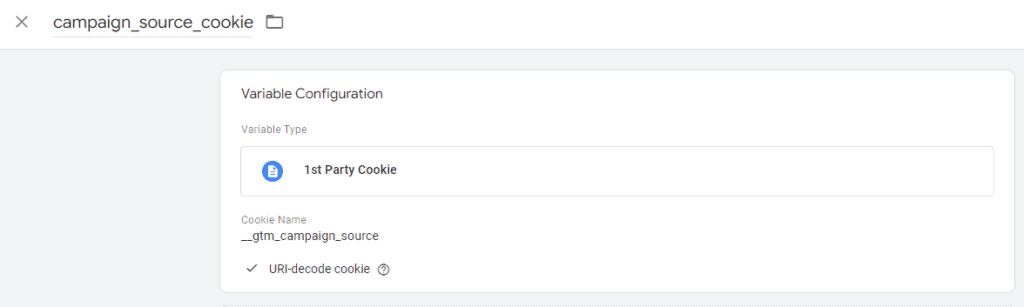
Creating First Party Variable
Now you need to create the first party variable which will store the value from the cookie creator into a variable.
- Go to the Variable section
- Again click on User Defined Variable
- Choose a variable called 1st Party Cookie
- Give the cookie name the same that you have created the cookie
- Click on URL-decode Cookie
- Give the name
- Save
Creating a script
Now Finally you need to create a script which will fill the form with all the value that you provided from the cookies
Creating Tag
- Go the Tag
- Create a new Tag and choose Custom HTML
- Copy and paste the following script into the field
<script>
(function () {
  var value = "{{campaign_source_cookie}}"         //fill with variable which information should be written into the field
  var selector = "input[id='evf-95-field_JNPHrL43Tl-7']"      //fill with CSS Selector that identifies the form field
  var field = document.querySelector(selector)
  if(field){ field.value = value||"(none)"; }
})();
</script>
In the above choice you need to look after the following things;
- Fill with a variable in which information should be written into the field
- Fill with CSS Selector that identifies the form field
Creating Trigger
Now for the trigger, we will need to fire this trigger where the page view is DOM ready.
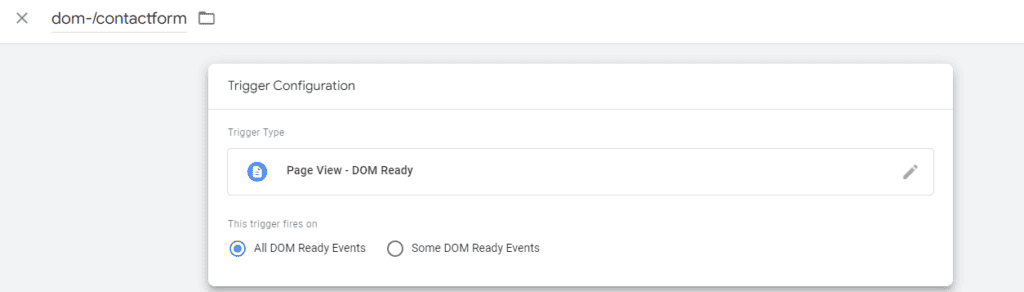
Save all the Tags and trigger.
Creating Form in WordPress.
Now you need to create a form in WordPress where the value can be stored. It can be a hidden text field as well. but for our example, the fields are not kept hidden
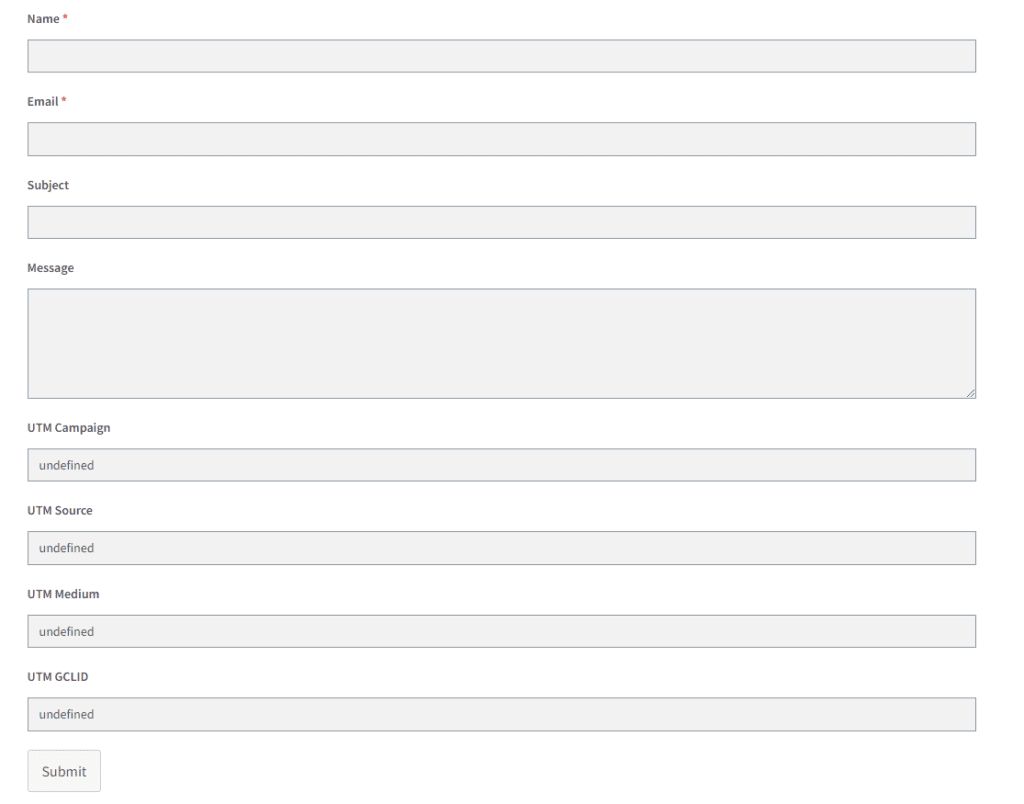
==You can choose any forms plugins to create a form as long as it is not a iframe==
Testing
Now you can test the tag by going to preview;
- Open the same URL that you have created using the URL creator
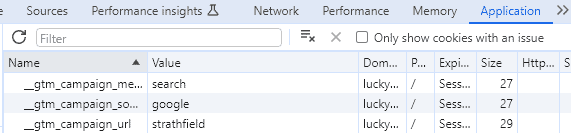
- Open the Inspect window and check the cookie if it has been stored or not
- Go to the Contact Us form page to check if the cookie values are stored on the form or not.
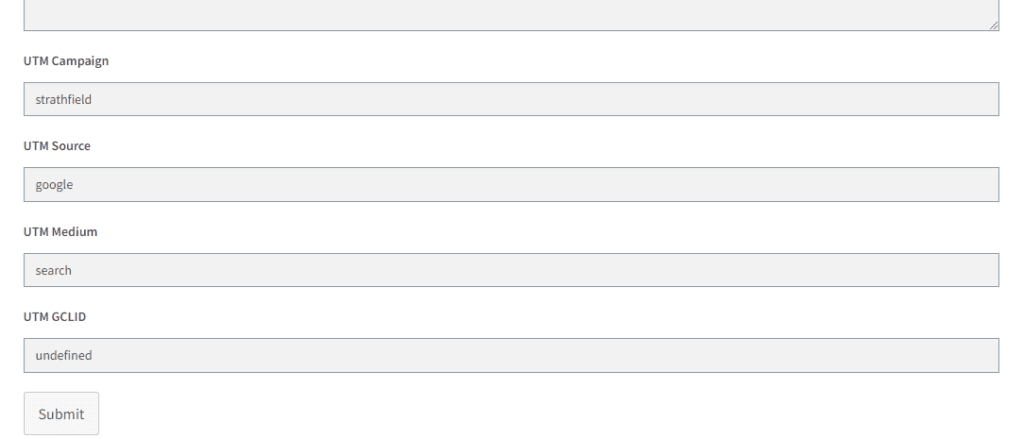
Now you can fill out your form submit the request and see the result in the entries section of your form.
Preview And Publish:
After configuring the GA4 tag, use the “Preview” mode in GTM to test its functionality.
- Browse your website and confirm that the GA4 tag is firing correctly in the GTM preview mode.
- Once satisfied with the test results, hit “Submit” in GTM to publish the container changes.
Conclusion and Important
In conclusion, by importing UTM parameters into cookies and embedding them in forms, you’ve set up a robust system to monitor user behaviour and traffic sources. Some of the important things that you need to look at are;
- Variable names
- Cookies name
- Proper naming of tags and trigger
- Check the security consent and user privacy

Humming Web
Let’s talk about your business goal and align the solution we provide with our digital marketing services.
FREE strategy callOur Services
© Humming Web. All Rights Reserved